I found some time last week to build the rotors. This step basically involved placing the magnets on the rotor plates, banding the rotors with stainless straps, and pouring vinyl ester resin in to fill up the space between the magnets.This part was actually really easy but it was a bit nerve racking because I hadn’t worked with any type of resins before. So, I was worried that the vinyl ester resin would harden too quickly or not at all. I read a number of horror storries on www.fieldlines.com about people having big problems and it being a costly mistake. It turned out to work pretty well and so I am more confident now going into casting the stator.
Anyway, I had bought the magnets, 1/4 inch steel rotor plates, and the stainless steel rotor bands a while ago and started to assemble them last week. I heated up the bands with only a propane torch and was able to slip them over the rotor plates. The book recommends using an oxygen acetylene torch but it turns out the propane is hot enough. It was as bit tough to do this without assistance, simply because you have only a couple of seconds to slip the bands over the plates before they have cooled down and no longer fit. You have to be quick. This is really a nice way to band the rotors since you don’t have to bother welding, screwing, gluing or anything else like that. The bands are held in place very tightly simply from contracting around the circumference of the steel plates as they cool.
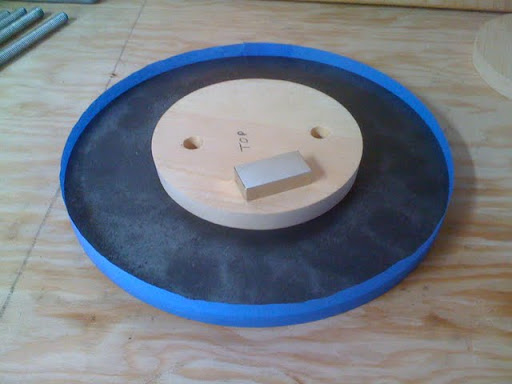
Well it turns out I banded the rotors before placing the magnets. That was a mistake. It was much harder to place the 12 very powerful magnets with the stainless steel bands in place because it keeps you from sliding the magnets on from the edge of the plate. It worked though with a bit of time and effort. Then I used a bit of supper glue around the edges of the magnets to temporarily hold them down. Next, I placed the 5 1/5 inch circular wooden “islands” in the center of the rotors using silicon caulk under them to create a seal. This keeps the resin from filling up the entire plate and running out the mounting holes. The book gives you a specification for these wooden peices. Make sure to put a slight inward angle all the way around the edge of the “islands” so they can easily pop out after pouring the resin. Mine broke because I had to pound them out with a hammer…not sure why. Below you can see the wooden “island”.
Next I had to cast the rotor with resin. I decided to do it pretty much to the specification in the book. I used a bit less filler but the recommended amount of hardener. I poured 3/4 of a quart of vinyl ester resin into a 2 quart measuring container and then added 3 cc of hardener. Then mixed it. This is half the amount recommended by the resin manufacturer, which is what the Homebrew Wind Power guys recommend. Then I added 1/4 of a quart of ATH as filler, so I had a total of one quart of material. Then mixed it. This is the total volume that the book says you will need for one rotor. Well, it turned out to be enough resin for both rotors and then some. Not sure what the deal is with that. I’m not too surprised though since I have seen them use plastic milk jugs and just estimate how much to use. 🙂
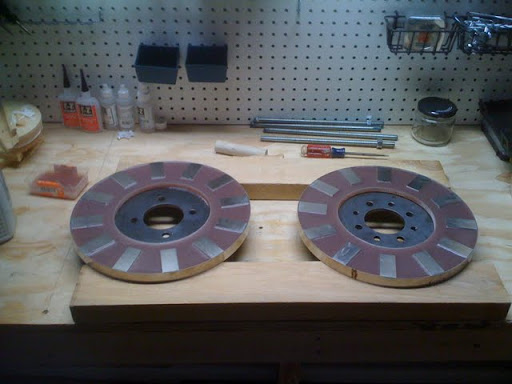
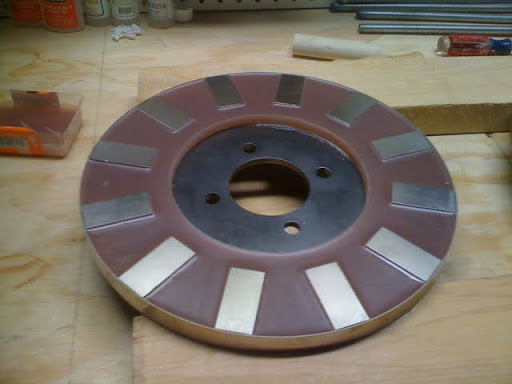
Anyway, after a few hours the resin had not hardened at all, so I got out an electric heater put the rotors up on 2 x 4s so there was airflow under them. The temperature got up to about 110 degrees with the heater so the rotors started hardening very quickly. I turned off the heater after it started to set and let it harden slowly all night. I think they turned out really nice because there was almost no shrinkage or cracking at all. They looked almost perfect without any sanding or anything. I might put a little caulk around the inner edge of the resin since there is a little gap where the silicon caulk squirted out from underneath the wood island during casting. Check them out below…